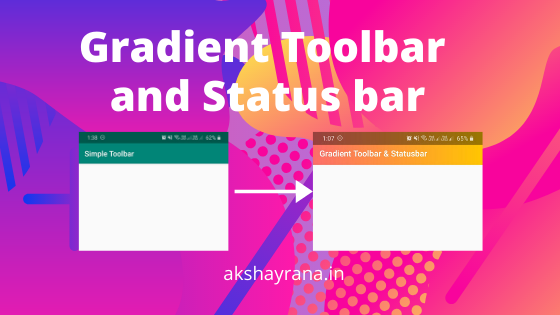
Hello there, Today we are going to learn how we can make an amazing custom toolbar with gradient effect and also apply the gradient to the status bar like below
First, let's create a new project or open your existing one.
To make gradient to status bar and toolbar we need to edit our styles.xml file to make it no action bar theme and apply full-screen so that we can add our custom status bar.
See below snippet of styles.xml and edit your like this.
Open res folder then open values folder and select style.xml.
<resources>

    <!-- Base application theme. -->
    <style name="AppTheme" parent="Theme.AppCompat.Light.DarkActionBar">
        <!-- Customize your theme here. -->
        <item name="colorPrimary">@color/colorPrimary</item>
        <item name="colorPrimaryDark">@color/colorPrimaryDark</item>
        <item name="colorAccent">@color/colorAccent</item>

    </style>

</resources>
First, we need to change the parent attribute and replace the value with
Theme.AppCompat.Light.NoActionBarNow we add some property in the styles.xml
<resources>

    <!-- Base application theme. -->
    <style name="AppTheme" parent="Theme.AppCompat.Light.DarkActionBar">
        <!-- Customize your theme here. -->
        <item name="colorPrimary">@color/colorPrimary</item>
        <item name="colorPrimaryDark">@color/colorPrimaryDark</item>
        <item name="colorAccent">@color/colorAccent</item>

        <item name="android:windowTranslucentStatus">true</item>
    </style>

</resources>
This will give us the ability to add a custom status bar.
For the custom toolbar, we need to make a custom layout file.
To do that we create a new layout file by right click on the layout folder and then click on new and then click on the layout resource folder.
We will name this file as
custom_toolbarIn this file, we will add a toolbar widget in the linear layout and set the height to action bar size and set id as toolbar. Also, we set the height of linear layout to 80sp and set gravity to bottom because the height of the default status bar is 24sp and the action bar size is 80sp - 24sp = 56sp.
Our file will look like this below.
<?xml version="1.0" encoding="utf-8"?>
<LinearLayout xmlns:android="http://schemas.android.com/apk/res/android"
    android:orientation="vertical" android:layout_width="match_parent"
    android:layout_height="80sp"
    android:background="@drawable/gradient_toolbar"
    android:gravity="bottom"
    >

    <androidx.appcompat.widget.Toolbar
        android:layout_width="match_parent"
        android:layout_height="?actionBarSize"
        android:id="@+id/toolbar"
        />

</LinearLayout>
To add the gradient to our toolbar and status bar we need to create gradient drawable so let's create a drawable file.
Right-click on the drawable folder then click on new and then drawable resource file and we name this file as
gradient_toolbarNow copy below code and paste it in your
gradient_toolbar<?xml version="1.0" encoding="utf-8"?>
<shape android:shape="rectangle" xmlns:android="http://schemas.android.com/apk/res/android">
<gradient
android:startColor="@color/startGradientColor"
android:endColor="@color/endGradientColor"
android:angle="180"
/>
</shape>In the above code, we are creating a new gradient background for our toolbar.
To set this background to toolbar we need to open our custom_toolbar.xml file and add background attribute to the linear layout.
Now we have completed our custom toolbar part now its time to apply this toolbar on our activity.
To do this open your activity xml file and include your custom_toolbar.xml file like this.
<?xml version="1.0" encoding="utf-8"?>
<androidx.constraintlayout.widget.ConstraintLayout xmlns:android="http://schemas.android.com/apk/res/android"
    xmlns:app="http://schemas.android.com/apk/res-auto"
    xmlns:tools="http://schemas.android.com/tools"
    android:layout_width="match_parent"
    android:layout_height="match_parent"
    tools:context=".MainActivity">

    <LinearLayout
        android:layout_width="match_parent"
        android:layout_height="wrap_content"
        app:layout_constraintTop_toTopOf="parent"
        >
        <include layout="@layout/custom_toolbar"/>
    </LinearLayout>

    ...

</androidx.constraintlayout.widget.ConstraintLayout>
After including the file we need to set the toolbar to action bar in your activity java file.
Open your activity java file and get toolbar by using findViewById and pass the toolbar id we set in custom_toolbar.xml file and call the setSupportActionBar method and pass our toolbar.
public class MainActivity extends AppCompatActivity {

    @Override
    protected void onCreate(Bundle savedInstanceState) {
        super.onCreate(savedInstanceState);
        setContentView(R.layout.activity_main);

        Toolbar toolbar = findViewById(R.id.toolbar);
        setSupportActionBar(toolbar);


    }
}
If you run your app you will see the gradient has applied successfully but the color of title in the toolbar is in black color which makes our toolbar look ugly. To make it look amazing we are adding white color to the toolbar title by calling method setTitleTextColor of toolbar widget and pass the
Color.WHITEtoolbar.setTitleTextColor(Color.WHITE);Now run your app and your beautiful and good looking custom toolbar will show up.
If you learn something new then share this article with your friends and mates. Thank You and have a nice day.