In this post, I will put a very basic deployment of Java war file on the IBM Cloud. Previously, IBM Cloud was known as IBM Bluemix. But in this post, I will prefer using the IBM Cloud and not the bluemix. I was facing problem while deploying the war file on the IBM Cloud for the first time. I am not a DevOps person who knows about the servers as well.
But my job was to deploy the application on the IBM Cloud I need to do it. So, I tried googling around but have no idea about how to do it. There are some examples are given but they are not so basic to be understood by a developer who wants to deploy the application in Cloud.
But I manage to do it. And I will explain all the steps that are needed to deploy the application to the Cloud. The application I am going to deploy is the Spring Boot application.
Requirements
But I manage to do it. And I will explain all the steps that are needed to deploy the application to the Cloud. The application I am going to deploy is the Spring Boot application.
Requirements
After signing for IBM Cloud, go to the IBM Cloud Dashboard. IBM Cloud provides you with some free applications to test your application. From there select the filter:lite. You will see some of the free applications provided by the IBM.
Since we are using the Java we will select the liberty-for-java from there.
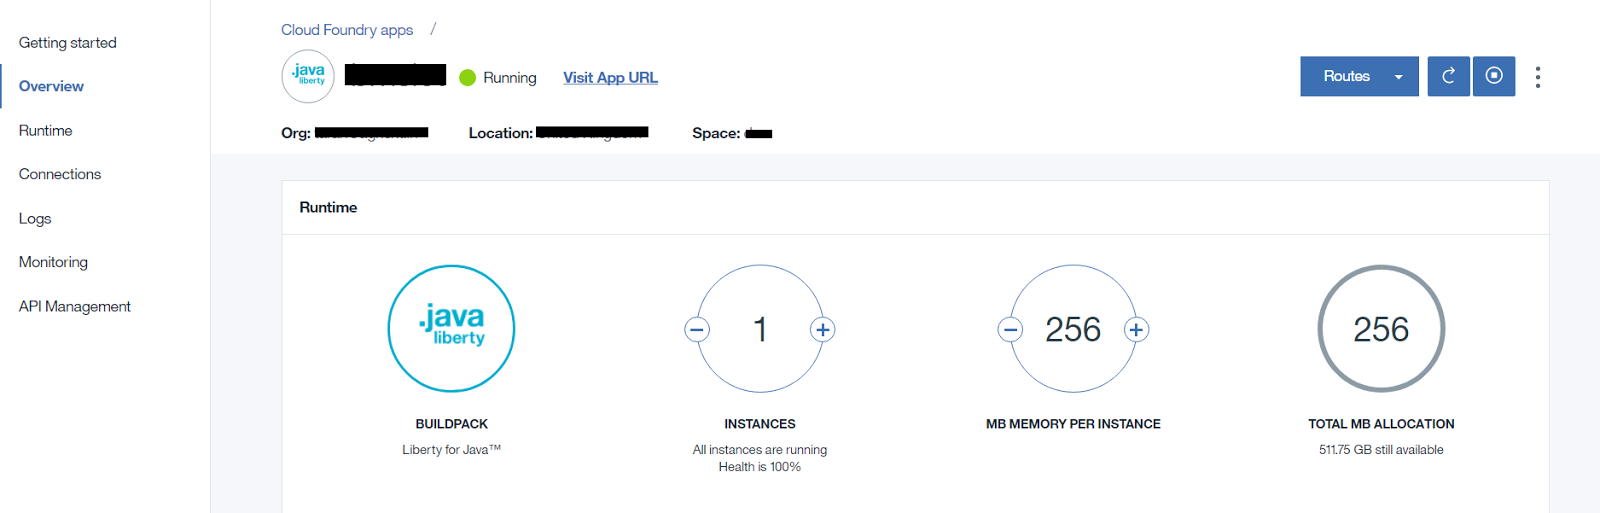
Now, it will ask for the name and other information. Enter the required one and it will create a Java profile in the cloud for you. Your Java environment is ready to be used by your application. You will see your dashboard as shown below after you have created a liberty-for-java app.
Yes, that's it. No other requirement is there. Now download the IBM Bluemix CLI client and setup it. It is a simple command line tool for interacting with the cloud.
Since we are using the Java we will select the liberty-for-java from there.
Now, it will ask for the name and other information. Enter the required one and it will create a Java profile in the cloud for you. Your Java environment is ready to be used by your application. You will see your dashboard as shown below after you have created a liberty-for-java app.
Yes, that's it. No other requirement is there. Now download the IBM Bluemix CLI client and setup it. It is a simple command line tool for interacting with the cloud.
War file Deployment on IBM Cloud
Go to the directory where your war file is kept and follow the below steps to deploy your application on cloud.
- Enter bluemix api https://api.xx-xx.bluemix.net on command. Here xx-xx is specific to the user. You have to see what your server is providing you.
- Then login to bluemix using the below command.
Herebluemix login -u <username> -o <organization> -s <space>- :username is mostly email id.
- the organization is also your email id until and unless you have paid account and created other.
- space is mostly dev unless otherwise created a new one
- Then enter the final command that will upload the war file to the cloud.
Herebluemix app push <appname> -b <buildpack> -p <war file>- :appname is the name of the application you have created when you create a liberty for Java profile.
- for buildpack, we will be using liberty-for-java, as our application is Java based.
- In the end, the name of the war file.