Introduction
PHP GD is a library that performs fantastic tasks that helps you to do several things with your image. As a PHP Developer, there are times when you have to survey some advanced functionality of your stack.
And one is the GD library, which is not easily done by most developers, and it helps you do anything with images.
If you’re ready, let's proceed to this PHP amazing library that helps you generate, and draw an image.
What Is GD Library?
GD is an acronym that stands for “GRAPHIC DRAW”.
The GD library in PHP enables you to create image data, and it’s the most used image processing tool in PHP. GD was originally developed by Thomas Boutell. By far it is a powerful image-processing library for PHP (it is also available for other languages like Perl).
GD library allows you to dynamically create and edit images, charts thumbnails, etc. The following file type that can be created or edited using the GD library, are GIF, JPEG, and PNG.
How Does GD Library Work?
One thing you should understand is that the GD library has a pattern in which it works. Now if you don’t follow the process of the GD library, you won’t see anything on your interface. Below are the steps for implementing the GD library in your project:
Step 1:
You must check if the GD library is enabled in your system's local server (XAMMP). If it’s disabled, you have to enable it; once it’s enabled, you are good to go.
If yours is enabled, you will see a display similar to the image below. To see if the GD library is enabled in your local server, go to your PHP index file and echo phpinfo(), then you’ll see the GD support in your interface.
Step 2:
You will go to your **index.php**, and create an image tag. And in the src of the image tag, you’ll write the address of the PHP file where you want to write the GD codes. So the image tag will look like this.
Now, this is where you’ll write the PHP code.
<img src="gd.php">
After this step, you’ll start writing some functions of the GD library. In the PHP file, your GD will start working automatically.
Using GD Library in Your Projects
Example
1. Using GD Library to create a Color-box with a JPEG extension, when saved.
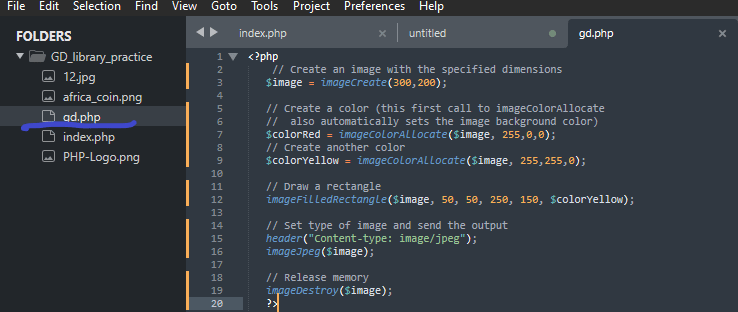
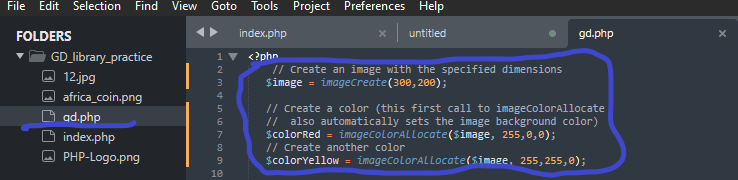
Step 1: Create an image with the specified dimensions
$image = imageCreate(300,200);
Step 2: Create a color (this first call to imageColorAllocate also automatically sets the image background color).
$colorRed = imageColorAllocate($image, 255,0,0);
Step 3: Create another color.
$colorYellow = imageColorAllocate($image, 255,255,0);
Step 4: Draw a rectangle.
imageFilledRectangle($image, 50, 50, 250, 150, $colorYellow);
Step 5: Set the type of image and send the output.
header("Content-type: image/jpeg");
imageJpeg($image);
Step 6: Release memory.
   imageDestroy($image);


<?php
   $image = imageCreate(300,200);

   $colorRed = imageColorAllocate($image, 255,0,0);
   $colorYellow = imageColorAllocate($image, 255,255,0);

   imageFilledRectangle($image, 50, 50, 250, 150, $colorYellow);

   header("Content-type: image/jpeg");
   imageJpeg($image);

   imageDestroy($image);
?>
By running the above code, you will get the output seen in the image below:
Example 2: Using the GD library to create and rotate a png image.
Run the code below to see how to rotate an image. You’ll have to put an image to the PHP file you’re working with, or else it won’t display on your interface.
// Create an image with the specified dimensions
   $image = imagecreatefrompng("africa_coin.png");//and the name of the image with specified extension.

    // Create a color
   $colorYellow = imageColorAllocate($image, 255,255,0);

  // Rotate
   $image=imagerotate($image, 60, $colorYellow);

   // Set type of image and send the output
   header("Content-type: image/png");
   imagePng($image);

   // Release memory
   imageDestroy($image);
By running the above code, you will get the output below:
Why You Should Use GD Library
GD is an advanced PHP; you can agree with me that, often, advanced PHP developers are the ones using the GD library. So if you want to be a king in the PHP realm, you have to use stuff like this.
Another reason you should use the GD library is that it helps you do dynamic things with images in your PHP files.
Lastly, It saves you the stress of writing lots of JavaScript, CSS & HTML code…
Other Things GD Library Can Be Used For
There are so many things out there that the GD library can be used for; it depends on the developer. Here are a few things you can use the GD library to achieve:
- You can use the GD library to build a Captcha system.
- You can use the GD library to reduce the quality of an image.
How to Generate an Image With GD Library
The way to generate images in GD is pretty simple if you have used it before. The first step to making an image to show is to use the ImageCreate() function. Then specify the width and height. But you'll have to use the function if you want to create an image with a png extension.
The functions mentioned above are a few listed functions that can be used to create a GD library. So, the pics below show some of those functions.
Conclusion
We’ve come to the end of this tutorial; hopefully, you got some ideas from the teaching. From the tutorial, we were able to bring to generate png and jpg images using the GD library.
This is not the end of the tutorial; we’ll talk more about how to use GD to make other things.
See you next time; enjoy!
About the Author
Emmanuel C. Okolie kick-started his journey as a software engineer in 2020. Over the years, he has grown full-blown skills in JavaScript, PHP, HTML & CSS, and more.
He is freelancing, building clients' websites, and writing technical tutorials teaching others how to do what he does.
Emmanuel C. Okolie is open and available to hear from you. You can reach him on Linked In, Google, Facebook, GitHub, Twitter, or on his website.
Also published here