Power up your logging and build good developer habits. As your codebase grows you’ll need to debug it more easily. One important tool in debugging is logging. This article focuses on the essential aspects of client-side JavaScript.
Client-side logging
For JavaScript, the logging your application will output will be visible in the console in your browser. This is different from server-side logging where logs will be written to a file or sent to a log aggregation server.
It’s important to know that browsers handle logging differently, but the basics are the same. See here how different browsers handle logging:
-
Chrome
-
Firefox
-
Safari
-
Microsoft Edge
A standard exists on how logging using console should work, but unfortunately, not all browsers respect it.
Most likely you are already comfortable using console.log(), but there are more methods on the console object to power up your logging!
Logging message levels
JavaScript supports different levels of messages. They all work the same but the output looks different. The level of the message conveys different meaning, for example you should use an error level when something went wrong, while the info level can be used for more generic logs.
I’m using Google Chrome version 98.0.4758 in my examples.
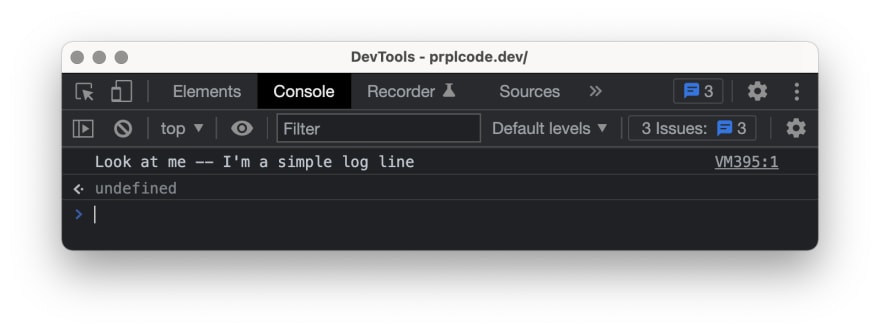
console.log()
Used for general output. Usually the same level as info.
console.log("Look at me -- I'm a simple log line");
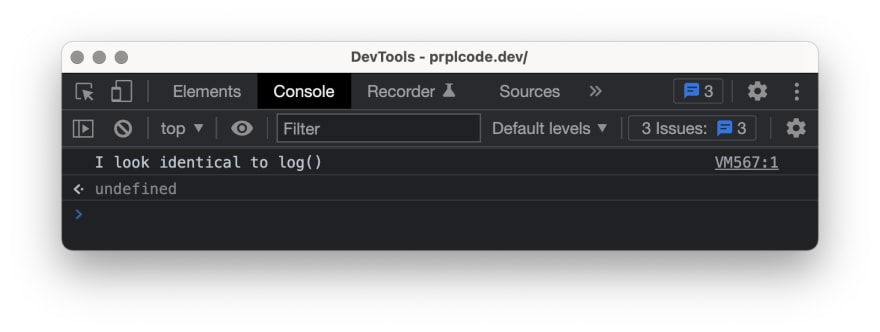
console.info()
Usually identical to log.
console.info("I look identical to log()");
console.debug()
Used for verbose logs that you don’t want in your production application log output. This level is special because you need to activate it yourself.
console.debug("Some debug output");
console.warn()
Used for warnings. Formats the message as a warning and in some browsers includes a stack trace.
console.warn("Warning! Something might be wrong");
console.error()
Used for errors. Formats the message as an error and includes a stack trace.
console.error("Error! Something went wrong");
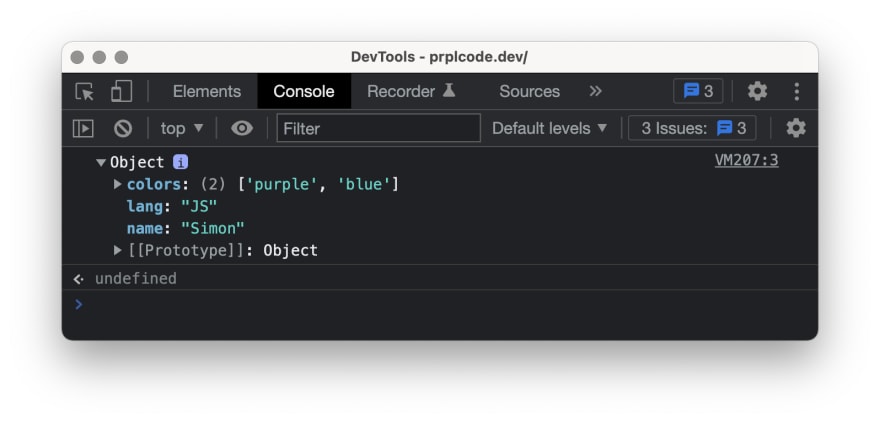
Log objects like JSON
To make it easier to read your object you can log it with JSON formatting applied.
const obj = { name: "Simon", lang: "JS", colors: ["purple", "blue"] };
console.dir(obj);
Counting things
It may be useful to log how many times a function is invoked, for example. To do this you can call console.count([label]). It will log the number of times it’s been called. If no label was provided it will fall back to the default label.
console.count();
console.count();
console.count("fruit");
console.count();
console.count("fruit");
Group log messages
Sometimes you might want to log lines that belong together. For this, you can use console.group(label) to create log groups. To log the group as collapsed you can use console.groupCollapsed(label).
const label = "Fruit";
console.group(label);
console.info("Apple");
console.info("Pear");
console.info("Banana");
console.info("Orange");
console.groupEnd(label);
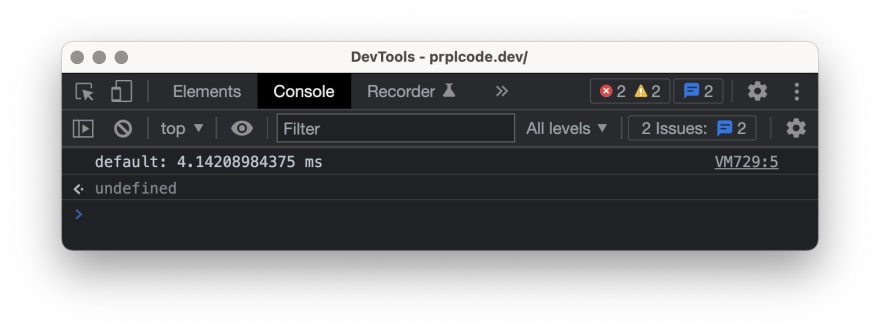
Measure time
At some point in your career, you might need to optimize the time your code takes to run. Before knowing what you optimize you want to understand where time is spent. One tool you can use is to measure time is console.time([label]). This will start a timer that you can then stop and log using console.timeEnd([label]).
console.time();
for (var i = 0; i < 100000; i++) {
  let random = Math.floor(Math.random() * i);
}
console.timeEnd();
Table formatting
To make it easier to read your array you can log it with table formatting.
const array = [
  { name: "Apple", color: "Red" },
  { name: "Banana", color: "Yellow" },
  { name: "Pear", color: "Green" },
  { name: "Orange", color: "Orange" }
];
console.table(array);
Conclusion
Client-side logging with JavaScript is straightforward! Using the built-in console object is the preferred way of logging in the browser. There are libraries out there but there’s really no need to use any.
Originally published here