In this article, you will learn how to build an AI-powered resume builder application using Nextjs, CopilotKit & OpenAI.
We will cover:
- Leverage ChatGPT to write your resume & cover letter 📑
- Gradually improve your resume by chatting with it 💬
- Export your resume & cover letter into a PDF 🖨️
CopilotKit: Build deeply integrated in-app AI chatbots 💬
Just a quick background about us. CopilotKit is the
Now back to the article.
Prerequisites
To get started with this tutorial, you need the following installed on your computer:
- A text editor (e.g., Visual Studio Code)
- Node.js
- A package manager
Creating The Resume App Frontend With NextJS
**Step 1:**Open the command prompt and execute the following command.
npx create-next-app@latest
Step 2: You will be prompted to select some options, as shown below.
Step 3: Open the newly created Nextjs project using a text editor of your choice. Then, run the command below on the command line to install Preline UI with NextJS using Tailwind CSS. Follow __this guide__to complete the Preline setup.
npm install preline
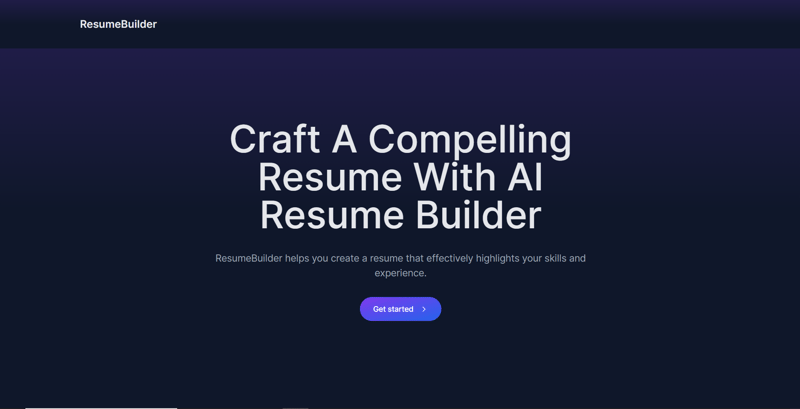
**Step 4:**On the resume/app/page.tsx file, add the following code content.
export default function Home() {
  return (
    <>
      <header className="flex flex-wrap sm:justify-start sm:flex-nowrap z-50 w-full bg-slate-900 bg-gradient-to-b from-violet-600/[.15] via-transparent text-sm py-3 sm:py-0 dark:bg-gray-800 dark:border-gray-700">
        <nav
          className="relative max-w-7xl w-full mx-auto px-4 sm:flex sm:items-center sm:justify-between sm:px-6 lg:px-8 "
          aria-label="Global">
          <div className="flex items-center justify-between">
            <a
              className="flex-none text-xl text-gray-200 font-semibold dark:text-white py-8"
              href="#"
              aria-label="Brand">
              ResumeBuilder
            </a>
          </div>
        </nav>
      </header>
      {/* <!-- Hero --> */}
      <div className="bg-slate-900 h-screen">
        <div className="bg-gradient-to-b from-violet-600/[.15] via-transparent">
          <div className="max-w-[85rem] mx-auto px-4 sm:px-6 lg:px-8 py-24 space-y-8">
            {/* <!-- Title --> */}
            <div className="max-w-3xl text-center mx-auto pt-10">
              <h1 className="block font-medium text-gray-200 text-4xl sm:text-5xl md:text-6xl lg:text-7xl">
                Craft A Compelling Resume With AI Resume Builder
              </h1>
            </div>
            {/* <!-- End Title --> */}

            <div className="max-w-3xl text-center mx-auto">
              <p className="text-lg text-gray-400">
                ResumeBuilder helps you create a resume that effectively
                highlights your skills and experience.
              </p>
            </div>

            {/* <!-- Buttons --> */}
            <div className="text-center">
              <a
                className="inline-flex justify-center items-center gap-x-3 text-center bg-gradient-to-tl from-blue-600 to-violet-600 shadow-lg shadow-transparent hover:shadow-blue-700/50 border border-transparent text-white text-sm font-medium rounded-full focus:outline-none focus:ring-2 focus:ring-blue-600 focus:ring-offset-2 focus:ring-offset-white py-3 px-6 dark:focus:ring-offset-gray-800"
                href="#">
                Get started
                <svg
                  className="flex-shrink-0 w-4 h-4"
                  xmlns="http://www.w3.org/2000/svg"
                  width="24"
                  height="24"
                  viewBox="0 0 24 24"
                  fill="none"
                  stroke="currentColor"
                  stroke-width="2"
                  stroke-linecap="round"
                  stroke-linejoin="round">
                  <path d="m9 18 6-6-6-6" />
                </svg>
              </a>
            </div>
            {/* <!-- End Buttons --> */}
          </div>
        </div>
      </div>
      {/* <!-- End Hero --> */}
    </>
  );
}
Step 5: Run the command npm run dev on the command line. Navigate to
Fetching Resume Data From GitHub Using GitHub GraphQL
**Step 1:**Install the Axios HTTP client using the command below.
npm i axios
**Step 2:**In the app folder, create a folder called API. Then, create a folder called GitHub in the API folder. Create a file called route.ts in the GitHub folder and add the following code.
import { NextResponse } from "next/server";
import axios from "axios";

// Environment variables for GitHub API token and user details
const GITHUB_TOKEN = "Your GitHub personal access token";
const GITHUB_USERNAME = "Your GitHub account username";

// Axios instance for GitHub GraphQL API
const githubApi = axios.create({
  baseURL: "https://api.github.com/graphql",
  headers: {
    Authorization: `bearer ${GITHUB_TOKEN}`,
    "Content-Type": "application/json",
  },
});

// GraphQL query to fetch user and repository data
const getUserAndReposQuery = `
  query {
    user(login: "${GITHUB_USERNAME}") {
      name
      email
      company
      bio
      repositories(first: 3, orderBy: {field: CREATED_AT, direction: DESC}) {
        edges {
          node {
            name
            url
            description
            createdAt
            ... on Repository {
              primaryLanguage{
                name
              }
                stargazers {
                  totalCount
                }
              }
          }
        }
      }
    }
  }
`;

// API route to handle resume data fetching
export async function GET(request: any) {
  try {
    // Fetch data from GitHub
    const response = await githubApi.post("", { query: getUserAndReposQuery });
    const userData = response.data.data.user;

    // Format resume data
    const resumeData = {
      name: userData.name,
      email: userData.email,
      company: userData.company,
      bio: userData.bio,
      repositories: userData.repositories.edges.map((repo: any) => ({
        name: repo.node.name,
        url: repo.node.url,
        created: repo.node.createdAt,
        description: repo.node.description,
        language: repo.node.primaryLanguage.name,
        stars: repo.node.stargazers.totalCount,
      })),
    };

    // Return formatted resume data
    return NextResponse.json(resumeData);
  } catch (error) {
    console.error("Error fetching data from GitHub:", error);
    return NextResponse.json({ message: "Internal Server Error" });
  }
}
**Step 3:**In the app folder, create a folder called Components. Then, create a file called githubdata.tsx in the components folder and add the following code.
"use client";

import React, { useEffect, useState } from "react";
import axios from "axios";

// Resume data interface
interface ResumeData {
    name: string;
    email: string;
    company: string;
    bio: string;
    repositories: {
      name: string;
      url: string;
      created: string;
      description: string;
      language: string;
      stars: number;
    }[];
  }


  export const useGithubData = () => {
    const [resumeData, setResumeData] = useState<ResumeData | null>(null);

    // Fetch resume data from API
    useEffect(() => {
        axios
        .get("/api/github")
        .then((response) => {
            setResumeData(response.data);
        })
    }, []);

  return { resumeData, };
  }
Creating Cover Letter And Resume Functionality
**Step 1:**Install the CopilotKit frontend packages by running the command below on the command line.
npm i @copilotkit/react-core @copilotkit/react-ui @copilotkit/react-textarea
**Step 2:**Create a file called resume.tsx in the components folder. Then import useMakeCopilotReadable, useMakeCopilotActionable, and useGithubData custom hooks at the top of the file as shown below.
import React, { useState } from "react";
import { useGithubData } from "./githubdata";
import {
    useMakeCopilotReadable,
    useMakeCopilotActionable,
  } from "@copilotkit/react-core";
**Step 3:**Create a component called CoverLetterAndResume. Inside the component, use the useGithubData hook to retrieve data fetched from GitHub. Then, declare a state variable called createCoverLetterAndResume and a function called setCreateCoverLetterAndResume that updates it. Initialize useState with an object containing two properties letter and resume, as shown below.
export const CoverLetterAndResume = () => {
    const {resumeData } = useGithubData();
    const [createCoverLetterAndResume, setCreateCoverLetterAndResume] = useState({
      letter: "",
      resume: ""
    });
}
**Step 4:**Use the useMakeCopilotReadable hook to add data fetched from GitHub as context for the in-app chatbot.
useMakeCopilotReadable(JSON.stringify(resumeData));
**Step 5:**Use the useMakeCopilotActionable hook to set up an action called createCoverLetterAndResume with a description and an implementation function that updates the createCoverLetterAndResume state with the provided cover letter and resume, as shown below.
useMakeCopilotActionable(
    {
      name: "createCoverLetterAndResume",
      description:
        "Create a cover letter and resume for a software developer job application.",
      argumentAnnotations: [
        {
          name: "coverLetterMarkdown",
          type: "string",
          description:
            "Markdown text for a cover letter to introduce yourself and briefly summarize your professional background as a software developer.",
          required: true,
        },
        {
          name: "resumeMarkdown",
          type: "string",
          description:
            "Markdown text for a resume that displays your professional background and relevant skills.",
          required: true,
        },
      ],
      implementation: async (coverLetterMarkdown, resumeMarkdown) => {
        setCreateCoverLetterAndResume((prevState) => ({
          ...prevState,
          letter: coverLetterMarkdown,
          resume: resumeMarkdown,
        }));
      },
    },
    []
  );
**Step 6:**Outside the CoverLetterAndResume component, create a component called CoverLetterResume that displays the cover letter and resume on the web app UI.
type CoverLetterResumeProps = {
  letter: string;
  resume: string;
};

const CoverLetterResume = ({ letter, resume }: CoverLetterResumeProps) => {
  return (
    <div className="px-4 sm:px-6 lg:px-8 bg-slate-50 py-4">
      <div className="sm:flex sm:items-center">
        <div className="sm:flex-auto">
          <h1 className="text-3xl font-semibold leading-6 text-gray-900">
            ResumeBuilder
          </h1>
        </div>
      </div>
      {/* Cover Letter Start */}
      <div className="mt-8 flow-root bg-slate-200">
        <div className="-mx-4 -my-2 overflow-x-auto sm:-mx-6 lg:-mx-8">
          <div className="inline-block min-w-full py-2 align-middle sm:px-6 lg:px-8">
            <div>
              <h2 className="text-lg font-semibold leading-6 text-gray-900 mb-4 p-2">
                Cover Letter
              </h2>
              <div className="min-w-full divide-y divide-gray-300 p-2">
                {/* <Thead /> */}
                <div className="divide-y divide-gray-200 bg-white p-2">
                  <ReactMarkdown>{letter}</ReactMarkdown>
                </div>
              </div>
            </div>
          </div>
        </div>
      </div>
      {/* Cover Letter End */}
      {/* Cover Letter Preview Start */}
      <div className="mt-8 flow-root bg-slate-200">
        <div className="-mx-4 -my-2 overflow-x-auto sm:-mx-6 lg:-mx-8">
          <div className="inline-block min-w-full py-2 align-middle sm:px-6 lg:px-8">
            <div>
              <h2 className="text-lg font-semibold leading-6 text-gray-900 mb-4 p-2">
                Cover Letter Preview
              </h2>
              <div className="min-w-full divide-y divide-gray-300">
                {/* <Thead /> */}
                <div className="divide-y divide-gray-200 bg-white">
                  <textarea
                    className="p-2"
                    id="coverLetter"
                    value={letter}
                    rows={20}
                    cols={113}
                  />
                </div>
              </div>
            </div>
          </div>
        </div>
      </div>
      {/* Cover Letter Preview End */}
      {/* Resume Start */}
      <div className="mt-8 flow-root bg-slate-200">
        <div className="-mx-4 -my-2 overflow-x-auto sm:-mx-6 lg:-mx-8">
          <div className="inline-block min-w-full py-2 align-middle sm:px-6 lg:px-8">
            <h2 className="text-lg font-semibold leading-6 text-gray-900 mb-4 p-2">
              Resume
            </h2>
            <div className="min-w-full divide-y divide-gray-300">
              {/* <Thead /> */}
              <div className="divide-y divide-gray-200 bg-white">
                <ReactMarkdown>{resume}</ReactMarkdown>
              </div>
            </div>
          </div>
        </div>
      </div>
      {/* Resume End */}
      {/* Cover Letter Preview Start */}
      <div className="mt-8 flow-root bg-slate-200">
        <div className="-mx-4 -my-2 overflow-x-auto sm:-mx-6 lg:-mx-8">
          <div className="inline-block min-w-full py-2 align-middle sm:px-6 lg:px-8">
            <div>
              <h2 className="text-lg font-semibold leading-6 text-gray-900 mb-4 p-2">
                Cover Letter Preview
              </h2>
              <div className="min-w-full divide-y divide-gray-300">
                {/* <Thead /> */}
                <div className="divide-y divide-gray-200 bg-white">
                  {/* {letter} */}
                  {/* <ReactMarkdown>{letter}</ReactMarkdown> */}
                  <textarea
                    className="p-2"
                    id="resume"
                    value={resume}
                    rows={20}
                    cols={113}
                  />
                </div>
              </div>
            </div>
          </div>
        </div>
      </div>
      {/* Cover Letter Preview End */}
    </div>
  );
};
**Step 7:**Then return the CoverLetterResume component inside the CoverLetterAndResume component as shown below.
return <CoverLetterResume {...createCoverLetterAndResume}/>;
**Step 8:**Create a folder called resumeandcoverletter in the app folder. Then, create a file called page.tsx and add the following code.
"use client";
import { CopilotProvider } from "@copilotkit/react-core";
import { CopilotSidebarUIProvider } from "@copilotkit/react-ui";
import "@copilotkit/react-textarea/styles.css"; // also import this if you want to use the CopilotTextarea component
import "@copilotkit/react-ui/styles.css"; // also import this if you want to use the chatbot component
import React, { useEffect, useState } from "react";
import { CoverLetterAndResume } from "../components/resume";

function buildResume () {
  return (
    <CopilotProvider chatApiEndpoint="./../api/copilotkit/chat">
      <CopilotSidebarUIProvider>
        <CoverLetterAndResume />
      </CopilotSidebarUIProvider>
    </CopilotProvider>
  );
}

export default buildResume;
**Step 9:**Install openai package using the command below.
npm i openai
**Step 10:**In the app folder, create a folder called API. Then, create a folder called copilotkit in the API folder. In the copilotkit folder, create a folder called chat. Then, create a file called route.ts in the chat folder and add the following code.
import OpenAI from "openai";

const openai = new OpenAI({
  apiKey: "Your ChatGPT API key",
});

export const runtime = "edge";

export async function POST(req: Request): Promise<Response> {
  try {
    const forwardedProps = await req.json();

    const stream = openai.beta.chat.completions
      .stream({
        model: "gpt-4-1106-preview",
        ...forwardedProps,
        stream: true,
      })
      .toReadableStream();

    return new Response(stream);
  } catch (error: any) {
    return new Response("", { status: 500, statusText: error.error.message });
  }
}
**Step 11:**On the page.tsx file in the app folder, add a link in the ‘Get Started’ button that navigates to the resumeandcoverletter page, as shown below.
<div className="text-center">
              <Link
                className="inline-flex justify-center items-center gap-x-3 text-center bg-gradient-to-tl from-blue-600 to-violet-600 shadow-lg shadow-transparent hover:shadow-blue-700/50 border border-transparent text-white text-sm font-medium rounded-full focus:outline-none focus:ring-2 focus:ring-blue-600 focus:ring-offset-2 focus:ring-offset-white py-3 px-6 dark:focus:ring-offset-gray-800"
                href="/resumeandcoverletter">
                Get started
                <svg
                  className="flex-shrink-0 w-4 h-4"
                  xmlns="http://www.w3.org/2000/svg"
                  width="24"
                  height="24"
                  viewBox="0 0 24 24"
                  fill="none"
                  stroke="currentColor"
                  stroke-width="2"
                  stroke-linecap="round"
                  stroke-linejoin="round">
                  <path d="m9 18 6-6-6-6" />
                </svg>
              </Link>
            </div>
Step 12: Navigate to
Step 13: Give the chatbot on the right side a prompt like “create a cover letter and resume.” The chatbot will start generating a response, and once it is done, it will display the generated cover letter and resume on the left side of the page, as shown below.
Creating Update Cover Letter Functionality
**Step 1:**Declare a variable called updateLetter that holds the cover letter generated earlier.
const updateLetter = createCoverLetterAndResume.letter;
**Step 2:**Use the useMakeCopilotReadable hook to add updateLetter as context for the in-app chatbot.
useMakeCopilotReadable("Cover Letter:" + JSON.stringify(updateLetter));
**Step 3:**Use the useMakeCopilotActionable hook to set up an action called updateCoverLetter with a description and an implementation function that updates the createCoverLetterAndResume state with the provided cover letter update, as shown below.
useMakeCopilotActionable(
    {
      name: "updateCoverLetter",
      description:
        "Update cover letter for a software developer job application.",
      argumentAnnotations: [
        {
          name: "updateCoverLetterMarkdown",
          type: "string",
          description:
            "Update markdown text for a cover letter to introduce yourself and briefly summarize your professional background as a software developer.",
          required: true,
        },
        {
          name: "resumeMarkdown",
          type: "string",
          description:
            "Markdown text for a resume that displays your professional background and relevant skills.",
          required: true,
        },
      ],
      implementation: async (updatedCoverLetterMarkdown) => {
        setCreateCoverLetterAndResume((prevState) => ({
          ...prevState,
          letter: updatedCoverLetterMarkdown,
        }));
      },
    },
    []
  );
Step 4: Give the chatbot a prompt like “Update the cover letter and add that I am applying for a technical writing role at CopilotKit.” As shown below, you can see the cover letter was updated.
Creating Update Resume Functionality
**Step 1:**Declare a variable called updateResume that holds the cover letter generated earlier.
const updateResume = createCoverLetterAndResume.resume;
**Step 2:**Use the useMakeCopilotReadable hook to add updateResume as context for the in-app chatbot.
useMakeCopilotReadable("Resume:" + JSON.stringify(updateResume));
**Step 3:**Use the useMakeCopilotActionable hook to set up an action called updateResume with a description and an implementation function that updates the createCoverLetterAndResume state with the provided cover letter update, as shown below.
useMakeCopilotActionable(
    {
      name: "updateResume",
      description: "Update resume for a software developer job application.",
      argumentAnnotations: [
        {
          name: "updateResumeMarkdown",
          type: "string",
          description:
            "Update markdown text for a resume that displays your professional background and relevant skills.",
          required: true,
        },
      ],
      implementation: async (updatedResumeMarkdown) => {
        setCreateCoverLetterAndResume((prevState) => ({
          ...prevState,
          resume: updatedResumeMarkdown,
        }));
      },
    },
    []
  );
Step 4: Give the chatbot a prompt like “Update the resume and add my name as John Doe and my email as
Creating Download Cover Letter And Resume Pdfs Functionality
**Step 1:**Install jsPDF, a library for generating PDFs in JavaScript.
npm i jspdf
**Step 2:**Inside the CoverLetterAndResume component, use the useMakeCopilotActionable hook to set up an action named "downloadPdfs" with a description and an implementation function that uses the jsPDF library to create PDFs for the cover letter and resume and then saves them, as shown below.
function addTextToPDF(doc: any, text: any, x: any, y: any, maxWidth: any) {
    // Split the text into lines
    const lines = doc.splitTextToSize(text, maxWidth);

    // Add lines to the document
    doc.text(lines, x, y);
  }

  useMakeCopilotActionable(
    {
      name: "downloadPdfs",
      description: "Download pdfs of the cover letter and resume.",
      argumentAnnotations: [
        {
          name: "coverLetterPdfA4",
          type: "string",
          description:
            "A Pdf that contains the cover letter converted from markdown text and fits A4 paper.",
          required: true,
        },
        {
          name: "resumePdfA4Paper",
          type: "string",
          description:
            "A Pdf that contains the resume converted from markdown text and fits A4 paper.",
          required: true,
        },
      ],
      implementation: async () => {

          const marginLeft = 10;
          const marginTop = 10;
          const maxWidth = 180;

          const coverLetterDoc = new jsPDF();
          addTextToPDF(
            coverLetterDoc,
            createCoverLetterAndResume.letter,
            marginLeft,
            marginTop,
            maxWidth
          );
          coverLetterDoc.save("coverLetter.pdf");

          const resumeDoc = new jsPDF();
          addTextToPDF(
            resumeDoc,
            createCoverLetterAndResume.resume,
            marginLeft,
            marginTop,
            maxWidth
          );
          resumeDoc.save("resume.pdf");
      },
    },
    [createCoverLetterAndResume]
  );
Step 3: Go back to the chatbot in the web app and give it the prompt “Download pdfs of the cover letter and resume.” The PDFs will start downloading, and if you open the coverLetter.pdf, you should see the cover letter generated, as shown below.
Conclusion
In conclusion, you can use CopilotKit to build in-app AI chatbots that can see the current app state and take action inside your app. The AI chatbot can talk to your app frontend, backend, and third-party services.
For the full source-code: