We've looked at many different ways to create live streaming experiences with Amazon Interactive Video Service (Amazon IVS) here on this blog, but all of those examples so far have focused on public channels that can be viewed by anyone without any playback authorization to verify that the viewer is allowed to view the live stream. Many live streaming user generated content (UGC) platforms do not require any authorization to view a stream, but there are use cases where we want to limit our stream viewers to a subset of our audience. For example, maybe our content creators want to charge a subscription for the content that they produce. Or, perhaps there are licensing limitations to the stream content that prohibit distribution to certain demographics or geographic locations. To address use cases where the platform must enforce playback authorization, Amazon IVS supports private channels. These channels will restrict playback to viewers who have obtained a token that is signed with a private key and verified with a public key. In this post, we'll look at how to enable playback authorization, create a playback key pair, generate a token, and play a private stream.
Creating a Private Channel
The first step in this workflow is to create a private channel. Creating a private channel is very similar to creating a public channel - the only difference is a single setting when creating the channel to enable playback authorization. We can enable playback authorization via the Amazon IVS Console, via the AWS CLI, or via any of the AWS SDKs.
Let's start by looking at how to create a private channel via the Amazon IVS Console. At the list of channels in the console, click Create channel.
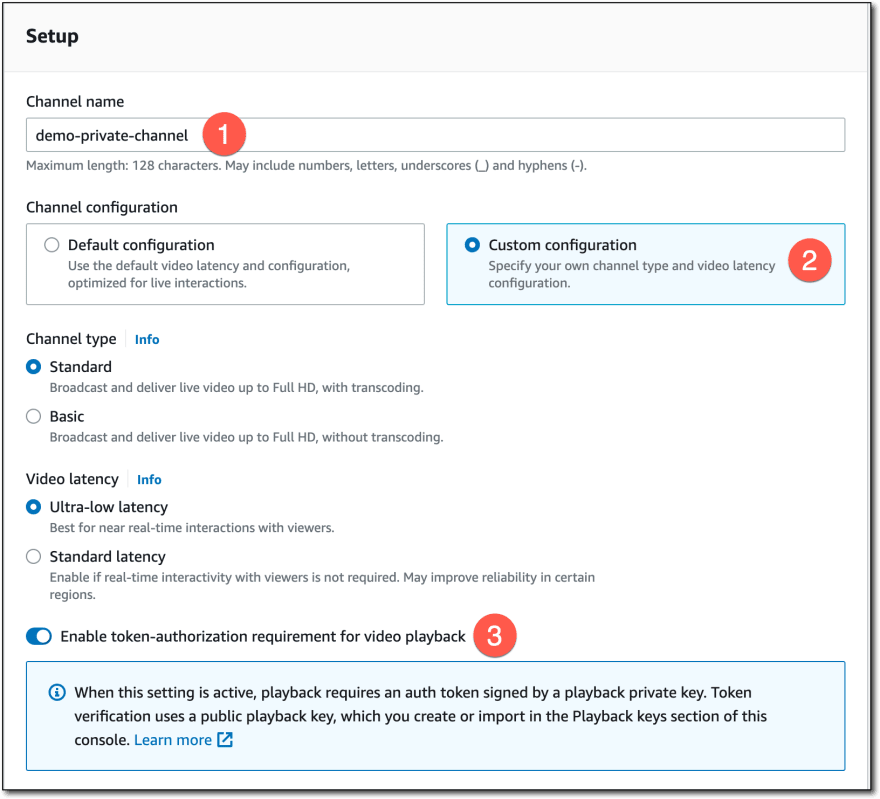
On the Create channel page, enter a channel name (#1), select Custom configuration (#2), and turn on Enable token-authorization requirement for video playback (#3).
If you prefer to use the CLI to create a channel, you can add the --authorized option.
$ aws ivs create-channel --name demo-private-channel --latency-mode LOW --type STANDARD --authorized
In reality, you're probably going to use the AWS SDK to create your user's channels. In this case, you can refer to the AWS SDK documentation for your favorite language to determine the appropriate argument to set for authorized playback. For example, here are the docs for CreateChannelCommandInput for the AWS SDK for JavaScript v3 which state that we can set a boolean authorized property when creating a channel.
Now that we have enabled playback authorization, if we were to broadcast to the channel and try to view the live playback without generating and passing a playback token, we will receive a playback error. Here's an example of playback using the Amazon IVS player SDK where we have added an ERROR listener to capture playback errors.
const streamUrl = '[private channel Playback Url]';
const ivsPlayer = IVSPlayer.create();
ivsPlayer.attachHTMLVideoElement(document.getElementById('video-player'));
ivsPlayer.load(streamUrl);
ivsPlayer.play();

ivsPlayer.addEventListener(IVSPlayer.PlayerEventType.ERROR, (err) => {
  console.log(err);
});
Running this in a browser when pointed at a private channel will result in the following error logged to the console.
{
  "type": "ErrorAuthorization",
  "code": 7,
  "source": "MasterPlaylist",
  "message": "invalid_playback_auth_token"
}
This confirms that our channel is indeed private, and requires a token to be generated and passed along with the Playback Url to authorize playback.
Creating a Playback Key
Before we can generate a playback token, we will need to create a private/public key pair and upload it to the Amazon IVS console. This key pair will be used to generate a JWT token that is signed with the private key, and verified with the public key, to authorize playback.
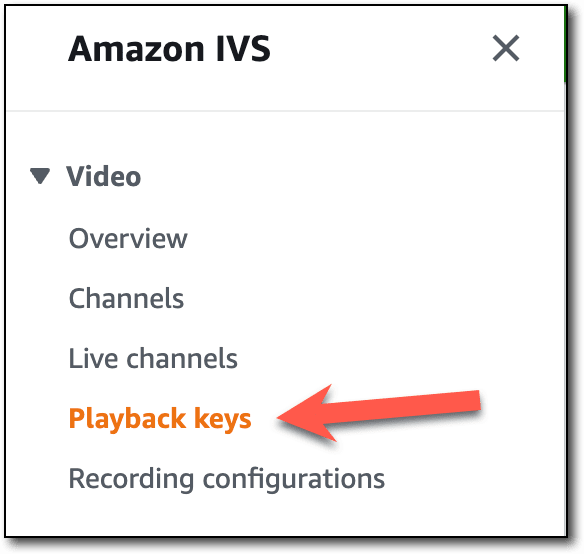
To manage Playback keys with the Amazon IVS Console, select Playback keys in the left navigation sidebar.
We can either create a key with the console, or manually with OpenSSL offline on our local machine. To create a key pair directly in the console. For this, click on Create playback key.
Give the key a name, and click Create.
The public key of this pair is saved to your AWS account and will be used to verify any playback requests that contain a token signed with the private key. When using the Amazon IVS Console to generate a key pair, the private key is immediately downloaded to your machine and is not saved in the console or available for further download.
Creating a Key Pair Offline
If you'd prefer to create your own key pair, you can do that offline and then import the public key into the Amazon IVS console. Here's an example of creating a key pair with OpenSSL.
$ openssl ecparam -name secp384r1 -genkey -noout -out demo-private-channel-private-key-1.pem
$ openssl ec -in demo-private-channel-private-key-1.pem  -pubout -out demo-private-channel-public-key-1.pem
To import the public key, click on Import on the Playback key list page.
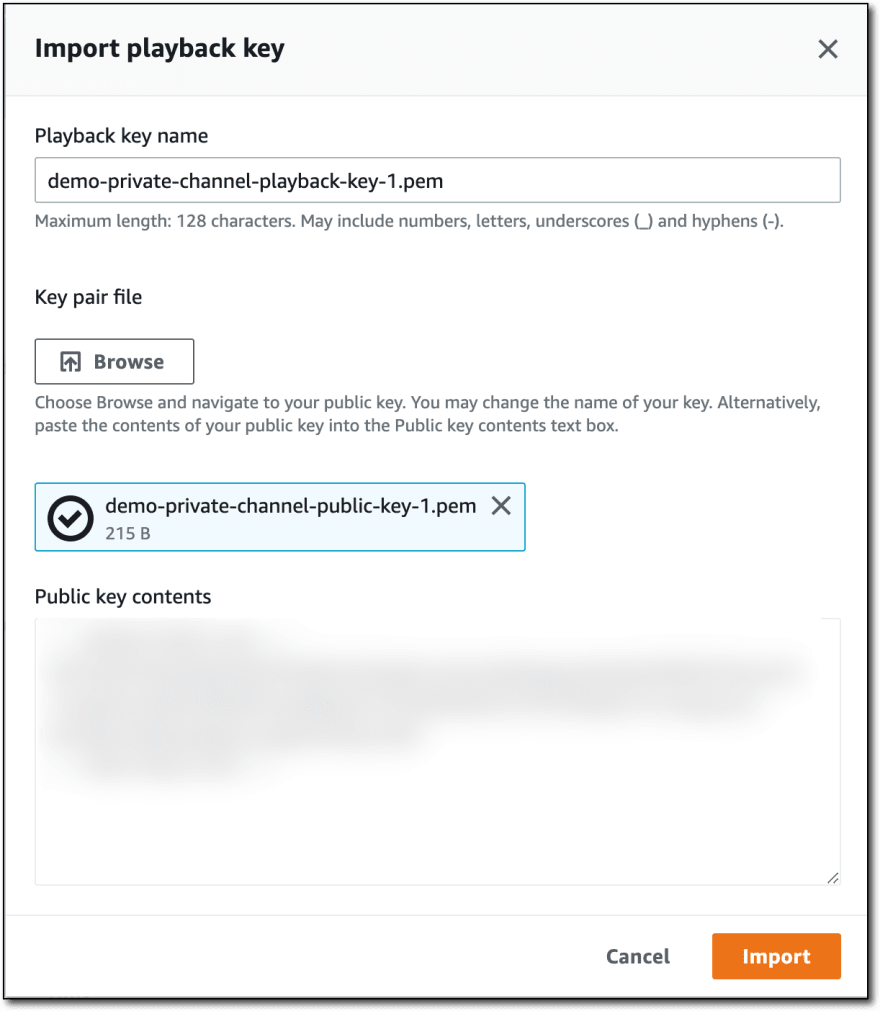
Give the imported key a name, and browse for the public key file (or paste the public key file contents).
This can also be done via the AWS CLI:
$ aws ivs \
    import-playback-key-pair \
    --name demo-private-channel-playback-key-1 \
    --public-key-material "`cat /path/to/your/public-key.pem`"
Or via the AWS SDK (docs for JavaScript example).
Private Channel Playback
Now that we have created a private channel and a playback key pair, we are ready to generate signed playback authorization tokens. In your application, your business logic will dictate which users should be granted an authorization token. As mentioned above, maybe your application logic will first check that the user is a valid subscriber to the channel by querying a database. Or, in the case of geo restrictions, maybe you'll have to look up the IP address of the viewer to make sure it is associate with a region that is able to view the stream. The exact implementation will vary, but once you determine whether the viewer is indeed authorized to view the stream, you can proceed with the token generation method described below.
Heads Up: Token generation will differ based on the language you're using on the backend. Refer to the user guide for details on the requirements.
To generate a token with Node.js, we can use the jsonwebtoken library (docs). This library will simplify the process and allow us to sign our payload with the SHA-384 signing algorithm as required by Amazon IVS. Our payload must contain the Channel ARN, an access-control-origin to limit playback to a specific domain (or * for all domains), and a token expiration timestamp. To sign the payload, we'll format it as below and use the private key that we created and imported above.
Note: The token is used to start playback on a private channel, so the expiration period only applies to the time between token generation and playback start. It does not relate to the amount of time the user can play a given stream. Once playback is authorized, it can continue until the user disconnects or reloads the web page.
Here's one way to generate a token on the backend (via a microservice or serverless application) using Node.js.
import jwt from "jsonwebtoken";

const getToken = () => {
  const privateChannelArn = process.env.DEMO_PRIVATE_CHANNEL_ARN; // private channel ARN
  const privateChannelPrivateKey = process.env.DEMO_PRIVATE_CHANNEL_PRIVATE_KEY; // playback private key

  const payload = {
    "aws:channel-arn": privateChannelArn,
    "aws:access-control-allow-origin": "*",
    "exp": Date.now() + (60 * 1000), // expires in 1 minute
  };

  const token = jwt.sign(payload, privateChannelPrivateKey, { algorithm: 'ES384' });
  return token;
}
In our frontend, we can retrieve the token from the backend and append it to the private channel's Playback Url. In the example below, I've trunacted the Playback Url (streamUrl) for brevity.
const streamUrl = `https://[truncated].m3u8?token=${token}`
const ivsPlayer = IVSPlayer.create();
ivsPlayer.attachHTMLVideoElement(document.getElementById('video-player'));
ivsPlayer.load(streamUrl);
ivsPlayer.play();
Summary
In this post we learned how to create private channels, create and import playback keypairs, and generate a JWT token for playback authorization. To learn more about private channels, refer to the user guide.